
Ready to transform your living room into an epic home cinema? Setting up a projector might seem like a task for the tech-savvy, but it's surprisingly simple! This guide will walk you through everything you need to know, from picking the perfect spot to fine-tuning the picture for a jaw-dropping movie night. We'll show you how to unleash the full potential of your projector and create a truly immersive viewing experience. Get ready for some serious fun!

Understanding Projector Basics
To get that cinema-quality picture you're dreaming of, proper installation and setup, including focus adjustments and connecting your devices, are key. Don't worry, it's easier than it sounds! Think of your projector as a new TV, but with way more flexibility. Also, keeping your projector happy with a little maintenance, like cleaning the air filters, will prevent it from overheating and ensure it lasts for many movie marathons to come.
Types of Projectors
There's a projector for every occasion! For massive movie nights, fast-fold screens are a popular choice for large events. If you need something more portable for smaller gatherings or educational settings, a tripod projector screen is a great option. Planning an outdoor movie night? You can't beat an inflatable screen, which can create a massive viewing area. For a more permanent setup, fixed-frame and motorized screens can be securely mounted on a wall or ceiling. And yes, a projector can absolutely replace a TV in your bedroom, as long as you have enough space and can control the lighting for that perfect cinematic feel. Here are some of the projectors in our range that feature auto keystone correction:


Choosing the Right Location
Finding the perfect home for your projector is the first step to cinematic bliss. Living rooms generally offer more space, making them a great choice for larger projection areas. Basements are also fantastic options because their natural darkness enhances image quality. For a true home theater feel, you can mount your projector on the ceiling, place it at the back of the room, or even in front of the screen. If you're dreaming of backyard movie nights, just be mindful of ambient light as projectors don't work well in broad daylight. No matter where you set it up, planning for cable management is a must to keep things tidy and safe.

Assessing Room Size and Layout
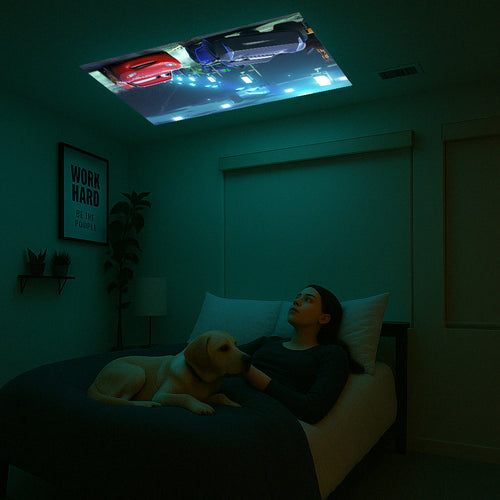
Before you do anything else, measure your room! This is crucial for making sure your projector's throw distance—the distance needed to create a certain image size—will work in your space. This is especially important in smaller rooms. Bedrooms, for instance, usually have limited space, so a compact projector with a suitable screen size and throw distance is key. Living rooms offer more flexibility but require some smart cable management. A dedicated home theater gives you the most freedom for placement, including ceiling mounts.
Impact of Ambient Light
Ambient light is the arch-nemesis of a great projector setup. It can wash out the image and reduce quality. To combat this, especially in a bright living room, consider using blackout curtains to reduce glare and boost contrast. You might also need to crank up the brightness, so a projector with a high lumen output is a good idea. Bedrooms and basements have a natural advantage here, as they are typically darker.
A Simple Step-by-Step Setup Guide
Once you've picked your spot, it's time for the fun part! Getting your projector up and running is as easy as 1-2-3. Let's walk through the software and connection basics.
Meet Your Projector's Brain: Smart Operating Systems
Many modern projectors have smart operating systems (OS) built right in, just like a Smart TV. This means you can stream content directly without extra devices! There are a few common types. Unsure of the difference between the Google platforms? Learn more about Android TV and Google TV.
- Google TV Projectors: This is Google's newer, content-focused interface that offers personalized recommendations and a more modern feel. Examples include our Page One & Episode One projectors.
- Android TV Projectors: A classic, straightforward smart TV platform from Google with access to the vast Google Play Store. You'll find it on models like The Spotlight Projector Series & The Cloud Projector.
- FengOS Projectors: This is a dedicated OS found on projectors like the Formovie S5. It's designed specifically for a premium home cinema experience. To learn more about this specialized OS, you can read our guide, What is FengOS?
Initial Projector Setup: From Box to Big Screen
You've unboxed your shiny new projector—now what? Let's walk through the first-time setup process to get you from the box to a brilliant picture in minutes.
- Placement and Power: Before you think about mounting, find a stable, level surface like a table or stand to place your projector. Point it towards your screen or a blank wall and plug it in. Power it on and grab your remote!
- First-Time On-Screen Guide: Most smart projectors will greet you with a setup wizard. This will guide you through basic settings like choosing your language, region, and time zone. Follow the on-screen prompts—it's usually very straightforward.
- Connect to WiFi: This is a crucial step! Use your remote to navigate to the network settings menu, find your home WiFi network, and enter the password. A stable WiFi connection is essential for smooth 4K streaming and receiving important software updates.
- Update Your Software: Once you're online, your projector may immediately prompt you to download a software update. Always say yes! These updates provide the latest features, security patches, and bug fixes, ensuring your projector runs perfectly. If it doesn't prompt you, it's good practice to check for updates in the settings menu.
-
Achieve the Perfect Picture (Alignment and Size): Now for the visual magic. This is a multi-part process:
- Get the Right Size (Throw Distance): Physically move the projector forward or backward to get the image to roughly fit your screen. This distance is called the "throw distance."
- Square Up the Image (Keystone Correction): Is the picture a trapezoid instead of a rectangle? That's what keystone correction is for! Many Formovie projectors have an auto-keystone feature that corrects this automatically. If not, you can find manual adjustments in the settings to make the image perfectly rectangular.
- Fine-Tune the Fit (Zoom): Once the image is square, use the digital zoom feature to make it fit your screen's borders precisely without having to move the projector again.
- Sharpen the View (Focus): Finally, adjust the focus until the image is crystal clear. This might be a physical ring around the lens or a setting you adjust with your remote. Look for sharp text or pixels on the screen as your guide.

Downloading Your Favorite Apps
With a smart projector, your favorite streaming services are just a few clicks away.
- Confirm Your WiFi Connection: Double-check that you're connected to the internet.
- Find the App Store: Locate the native app store for your projector's OS (like the Google Play Store on Android TV models). This is your gateway to apps like YouTube, Prime Video, and more.
- Download and Sign In: Find the apps you want, download them, and sign in to your accounts. Some apps may not be natively supported on all platforms. If you run into trouble, our guide on why you can't watch Netflix might have the fix.
Connecting Your Devices
Want to project content from your laptop, game console, or phone? No problem!
- HDMI for a Stable Connection: The most reliable way to connect a laptop, Blu-ray player, or gaming console is with an HDMI cable. It carries both high-quality video and audio in one cable.
- Go Wireless: Many projectors support wireless screen mirroring (like Chromecast or Miracast). This lets you cast your screen from a compatible laptop or smartphone without any cables.
- Connect Your Phone: You can also connect your phone directly. For a full breakdown of the best methods, check out our guide on how to connect your phone to a projector, both wired and wirelessly.

Selecting the Ideal Screen
A projector's best friend is a good screen. While a plain white wall can work in a pinch, a dedicated screen will significantly improve brightness and reject ambient light. Projectors offer the amazing ability to create a much larger image than a TV, from 50 inches to over 100 inches! Remember, a bigger image means the projector needs to be further from the screen. Consider your viewing area and setup when choosing your screen size. You also have different types of screens to choose from, like inflatable or portable options for different venues. Don't forget about aspect ratio and resolution; these are key for a clear and high-quality image. The most common aspect ratio for home theaters is 16:9.
Fixed vs. Retractable Screens
For a dedicated home theater, a fixed-frame screen is a great choice. It's mounted securely to the wall or ceiling, providing a perfectly flat and tensioned surface. If your room serves multiple purposes, a retractable screen (either manual pull-down or motorized) is a fantastic, tidy solution that can be hidden when not in use. Wall-mounted screens are generally easy to set up and keep the image flat. A fixed screen offers a more permanent and integrated look, while roll-down and motorized screens save space. Here are some of the great options of fixed and portable screens we have in The Projection Room:


Screen Size and Aspect Ratio
Most home theater projectors use a 16:9 aspect ratio for a widescreen, cinematic experience. Screen sizes can vary dramatically, with popular choices being 100 or 120 inches for an immersive feel. It's important to match your projector's aspect ratio to your screen to avoid a stretched or compressed image.
Properly Mounting Your Projector
A ceiling mount is a popular and practical choice as it saves space and allows for an optimal throw distance, creating a permanent and clean setup. Alternatively, a table mount offers more flexibility for moving and adjusting the projector. Professional installation services can handle everything from unboxing and focusing to connecting to Wi-Fi. Most projectors are designed for either ceiling or table mounting. When mounting on the ceiling, aligning the projector with the center of the screen is crucial for the best image quality.
Ceiling vs. Wall Mounts
Ceiling mounts are a space-saving hero, perfect for bedrooms and home cinemas, offering an unobstructed view. They are ideal for achieving the perfect throw distance and image alignment. For a seamless look, ceiling-mounted projectors can even be hidden in a fixed box-out or with a projector lift. When a ceiling installation isn't possible, a wall mount is a great alternative that still allows for easy angle adjustments.

Ideal Mounting Height and Distance
The projection distance is a critical measurement that dictates how far the projector needs to be from the screen. Your projector's manual will provide guidance on the ideal mounting height. Wall-mounted projectors offer flexibility in adjusting the projection angle for optimal quality. For ceiling mounts, ensure the projector is adjusted to its specific throw and height requirements.
Aligning and Adjusting the Image
To get that perfectly rectangular image, using an alignment image can help you adjust the projector's height and distance to fit the screen edge to edge. Use the zoom function to fit the image to the screen without physically moving the projector. After zooming, fine-tuning the focus is essential for a sharp picture. Some projectors even have automatic keystone correction to fix distortion if the projector isn't perfectly perpendicular to the screen. For the final check, use actual video content to ensure the image is perfectly aligned.
Using Keystone Correction
Keystone correction is a handy feature that fixes trapezoidal distortions when your projector isn't perfectly centered. However, since it electronically manipulates the image, it can sometimes affect resolution, so it's best to position the projector as accurately as possible first. Many projectors offer both automatic and manual keystone correction.
Fine-Tuning Focus and Zoom
For a crystal-clear image, use the focus ring or digital focus controls to get both the center and the edges of the image sharp. The zoom function will help you perfectly fit the image to your screen. Newer models may even allow you to adjust focus and zoom with a remote. If the image is still blurry after adjustments, your projector might be too close for the screen size.
Adjusting Picture Settings
Fine-tuning the picture settings is where the magic really happens. Adjusting keystone and using an alignment image will get you started. Focus is crucial for a crisp image. Modern projectors offer various display modes for different lighting conditions. For the best color and clarity, consider using a high-quality projection screen and performing a color calibration. The zoom function is also your friend for getting the image size just right.
Optimizing Brightness and Contrast
Adjusting the brightness (measured in lumens) and contrast is key to a great picture in any environment. In well-lit rooms, you'll need to increase the brightness. For a dark home theater, at least 1500 lumens is recommended. Proper calibration of brightness, contrast, and color will make your movies pop.
Selecting the Right Picture Mode
Just like TVs, projectors have preset picture modes. For watching movies in a dark room, "Movie" or "Cinema" mode will give you the best quality. In rooms with more light, "Vivid" or "Dynamic" can provide a brighter image, although colors might be slightly skewed. Formovie projectors offer a variety of picture modes and resolutions to cater to different projection needs.
Enhancing Sound Quality
Let's be honest, the built-in speakers on most projectors won't do your epic movie night justice. Using external speakers or a soundbar will dramatically improve dialogue clarity and bass. If you notice the audio and video are out of sync, you can adjust the audio sync settings on your projector or AV receiver. For a truly immersive experience, consider a surround sound setup. Most projectors have standard audio outputs that are compatible with a wide range of sound systems.
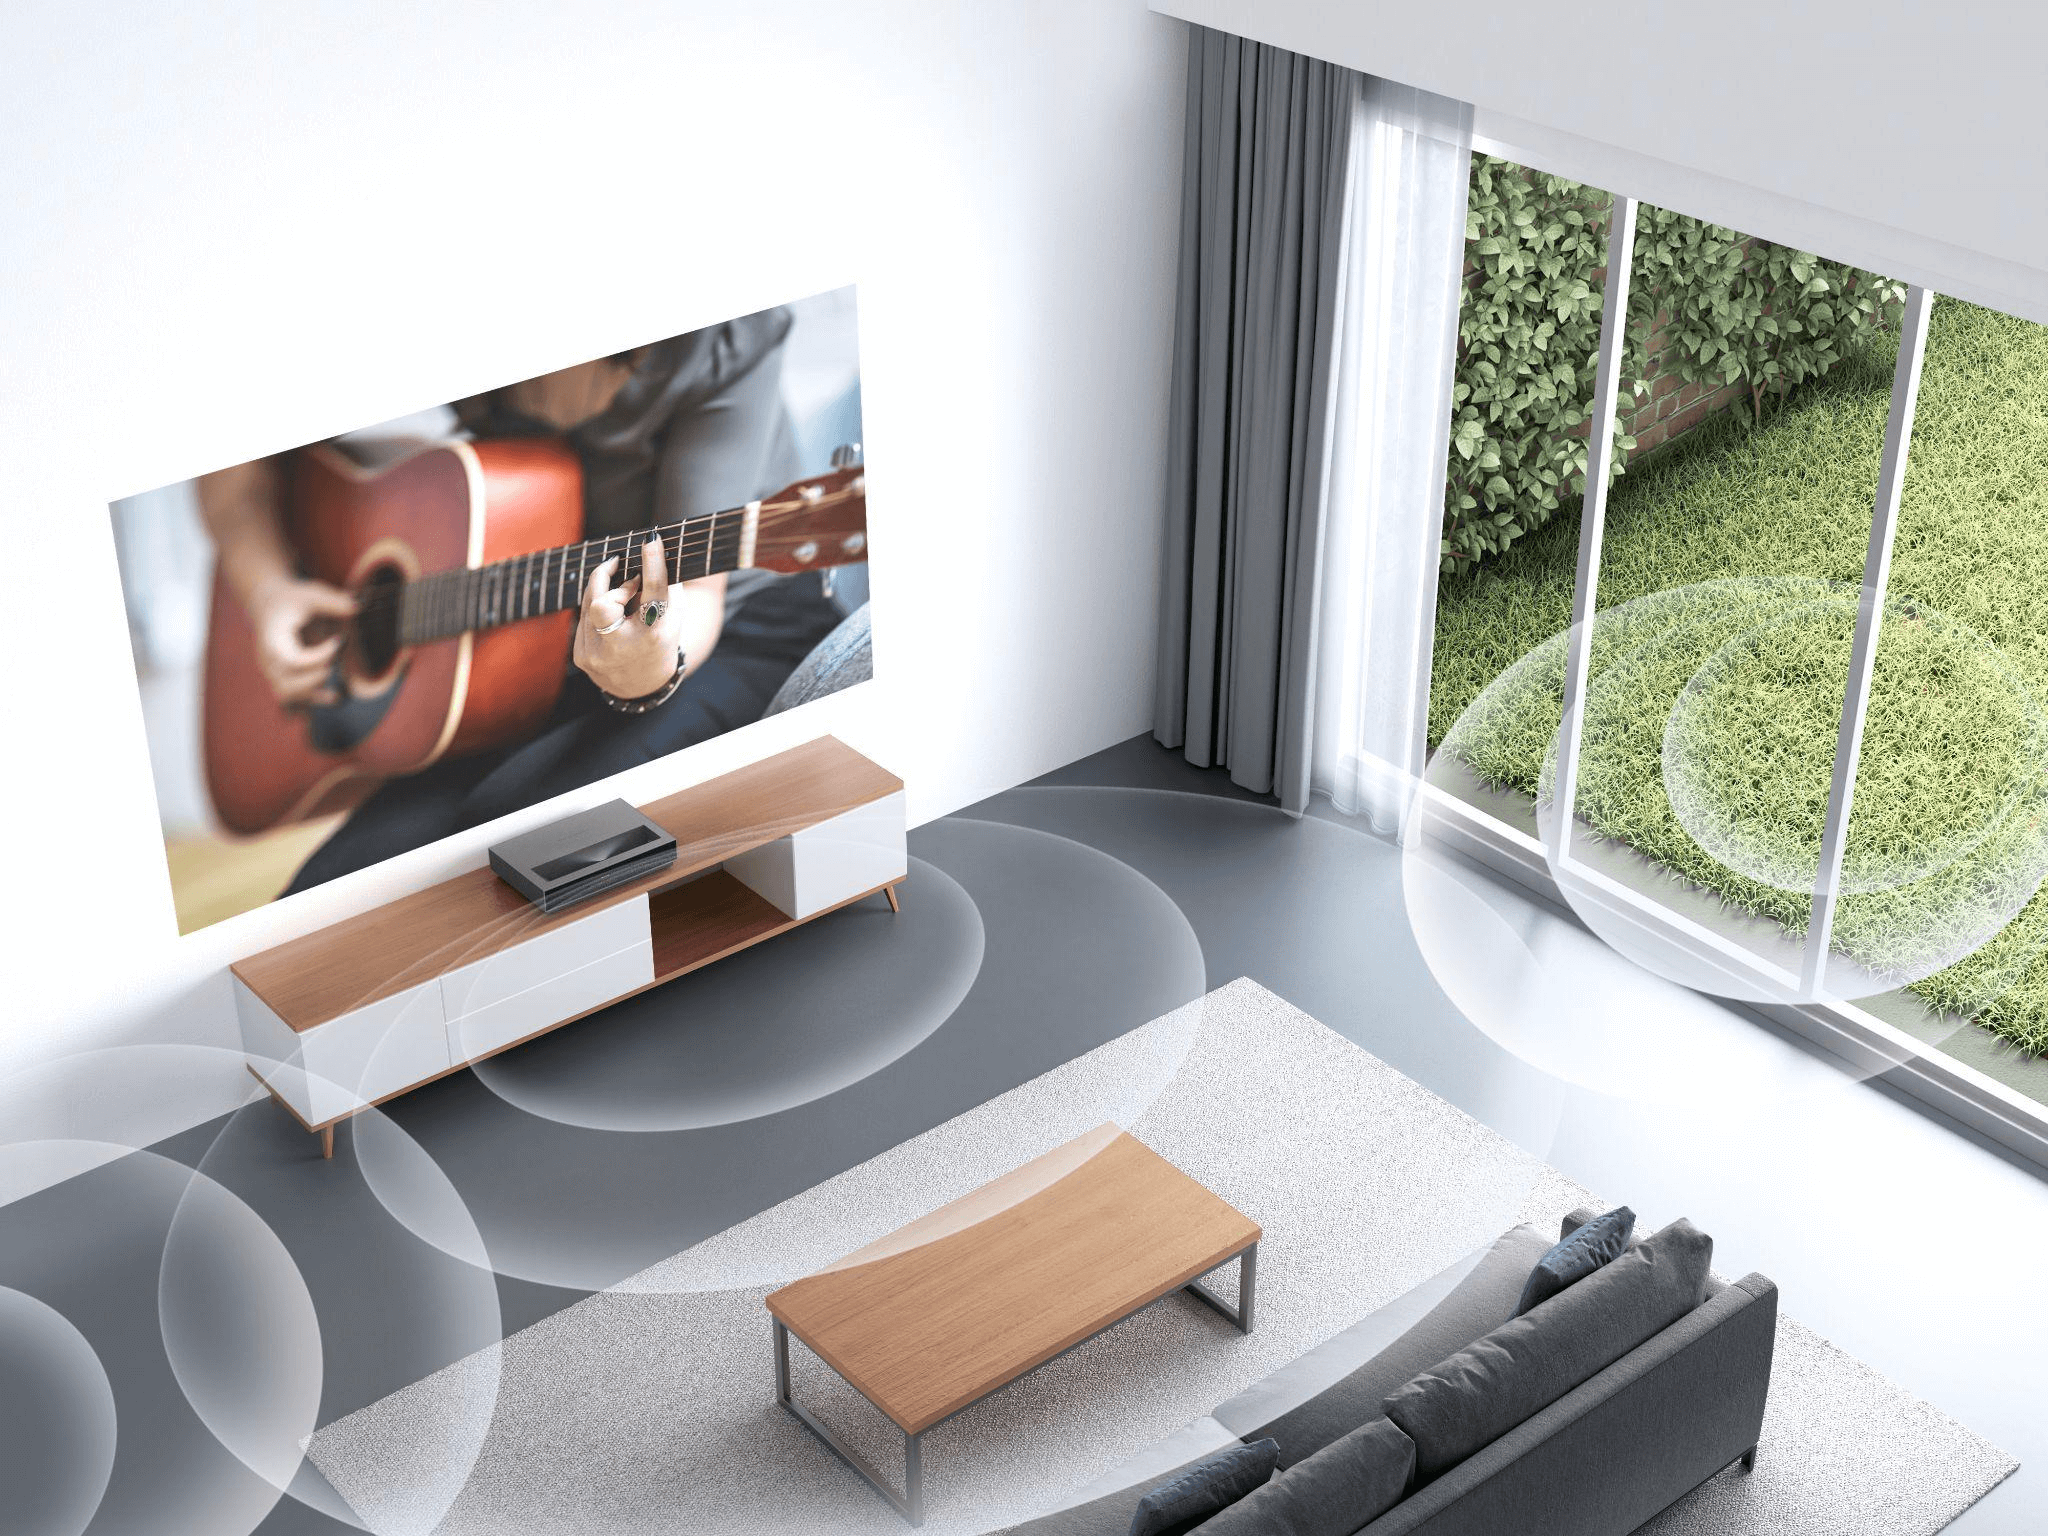
Choosing the Right Speaker System
Since most projectors have weak or no built-in speakers, an external sound system is a must for a cinematic experience. Look for a surround sound system or a good quality soundbar. Make sure your projector has the necessary output ports to connect to your chosen audio solution. For a clean, cable-free setup, Bluetooth soundbars and speakers are a great option.
Wired vs. Wireless Audio Solutions
HDMI cables are a great wired option as they carry both video and audio signals. Wired setups are often more straightforward. Wireless audio devices like Bluetooth soundbars can reduce cable clutter and are common on portable projectors, allowing easy connection to your phone or tablet. If you go with a wired setup, be sure to manage your cables neatly for a clean look and to prevent tripping hazards.
Advantages and Disadvantages of Home Projectors
The biggest advantage of a home projector is the massive image size, which creates a truly cinematic experience. Advanced features like auto keystone correction and obstacle avoidance on some models make setup a breeze. However, projectors are sensitive to ambient light and require a bit more planning for installation.
Pros of Using Projectors
Projectors bring the movie theater experience home, perfect for family movie nights. They also take up less space than a large TV when not in use, making them great for smaller rooms. Their versatility allows them to be used for both entertainment and professional presentations.
Cons and Potential Drawbacks
Setting up a projector in a small bedroom can be tricky due to space limitations. Portable projectors, while convenient, may be less powerful than their stationary counterparts. Proper cable management is essential to avoid a messy and potentially hazardous setup. Large windows in a living room can create a lot of ambient light, which can be a challenge for image quality. A permanent, fixed installation limits the projector's flexibility.
Recommendations for Specific Models
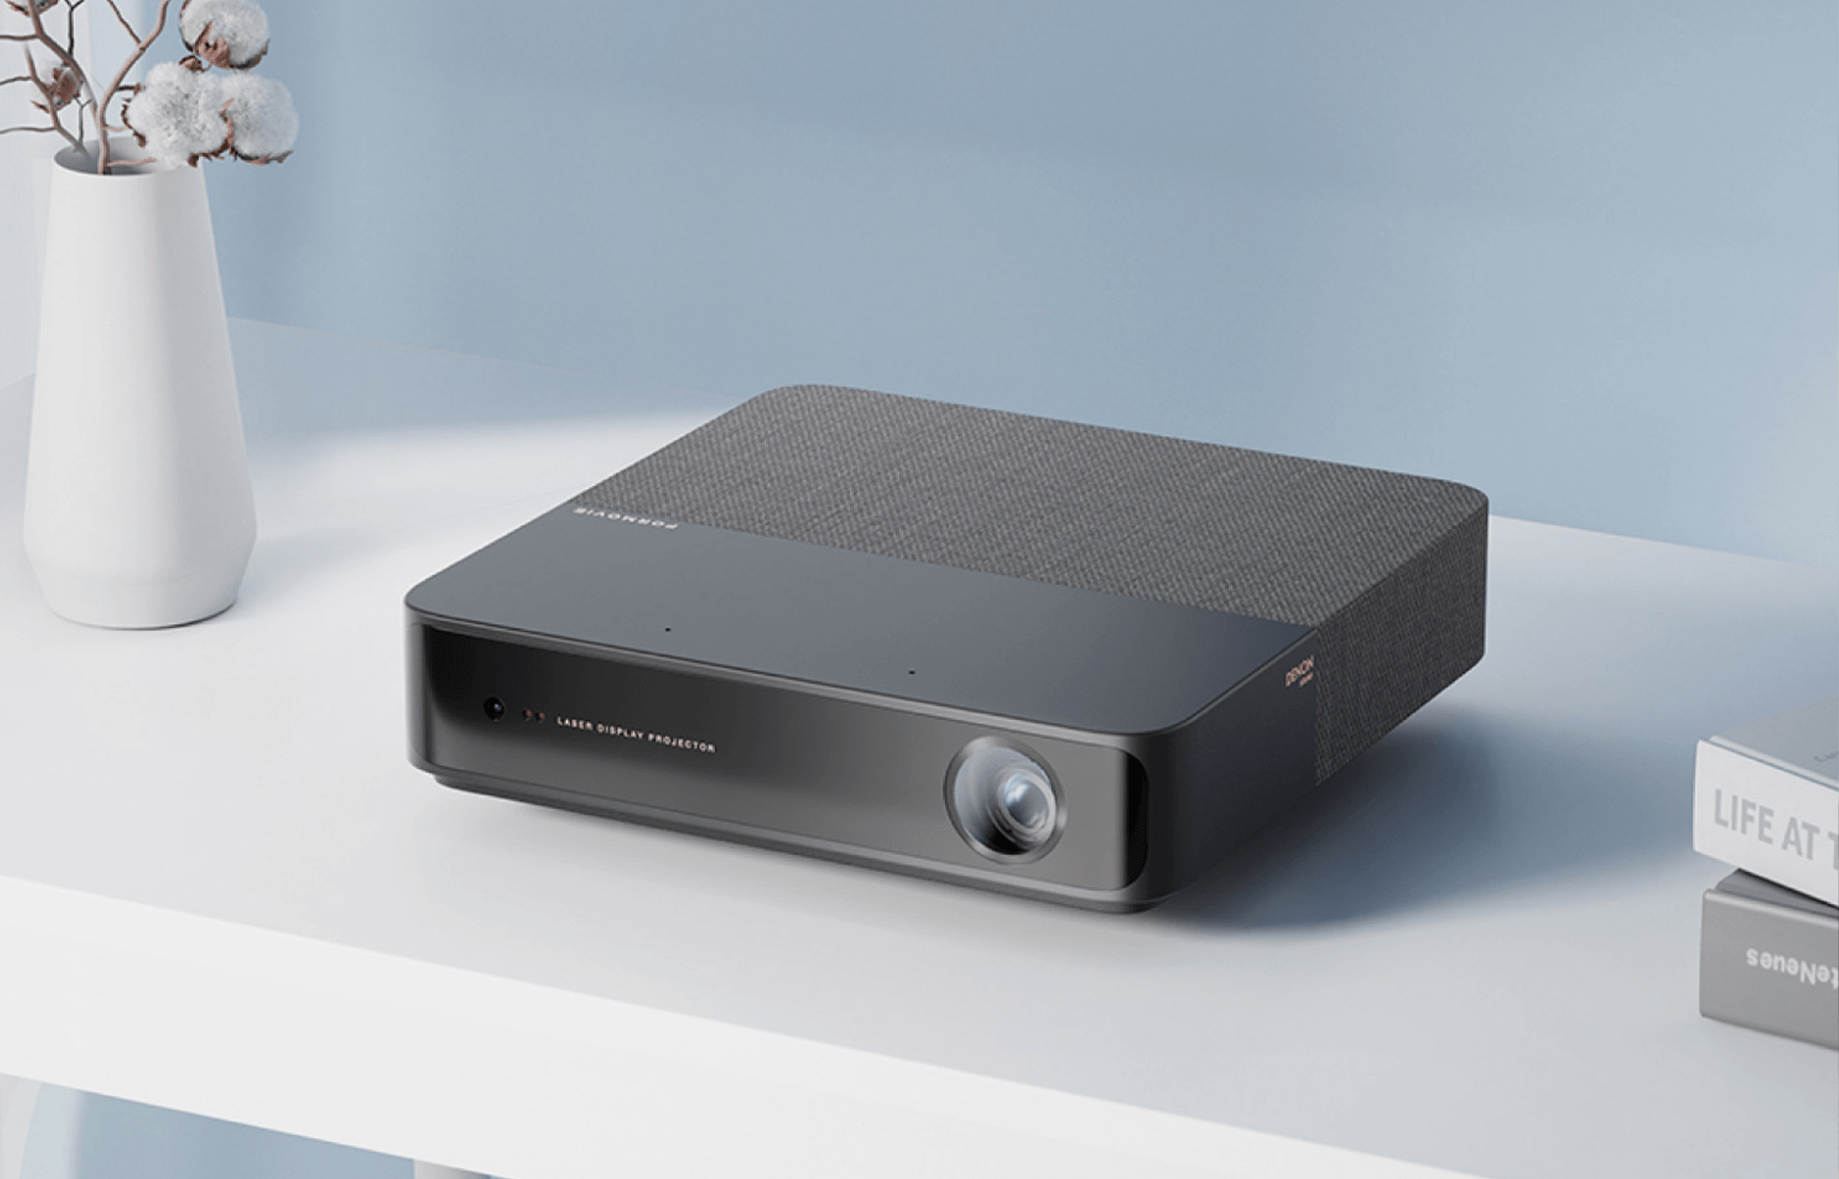
For a great portable option, the Formovie S5 is a smart projector that is ideal for both apartment theaters and outdoor activities. The Formovie THEATER projector is equipped with advanced features such as auto keystone correction, auto-focus, and intelligent obstacle avoidance to ensure an immersive viewing experience with minimal setup. One of the prominent features of Formovie projectors is their brightness level, providing clear and vivid images even in bright environments. For those seeking a professional mounting system for a projector, its advised to consult the manual or the manufacturers website to acquire a mount rated for the correct weight and appropriate screw types. Different projector models offer 2D and 3D settings, which enhance image quality depending on the media, with some automatically detecting 3D content and adjusting settings accordingly.
Budget-Friendly Options
Creating a home cinema doesn't have to break the bank. While options like using a plain wall or specialized paint exist, the best way to get a fantastic-value cinematic experience is with a dedicated, budget-friendly projector.
That's why we're so excited about our new mini projector collection! These compact powerhouses are designed to deliver a stunning big-screen experience at a fraction of the cost of larger models. They are the perfect starting point for anyone looking to build their home theater without a huge investment, offering incredible quality and versatility that you just can't get from a painted wall.
Explore our full range of affordable options and find the perfect fit for your home and budget.
Shop the Mini Projector Collection Now!


